Every technician and assistant needs to be skilled at making slides of ear and skin cytology, and technicians need to be adept at microscopic evaluation. This article describes the steps needed to create the slide.
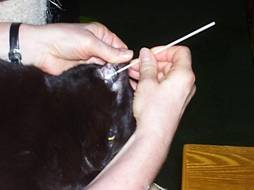
Figure 1: Press and roll a cotton swab along the affected ear or skin. It may help to very lightly moisten swab with saline
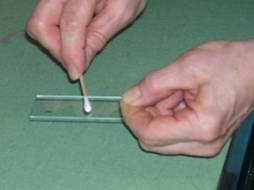
Figure 2: Roll the swab in several spots on a new slide and allow to air dry

Figure 3: Move a flame back and forth under the sample area for about 10 seconds, to help fix the cells to the slide. It is normal for the underside of the slide to blacken. Be careful not to burn yourself!
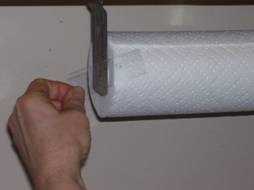
Figure 4: Wipe off the soot from the underside of the slide
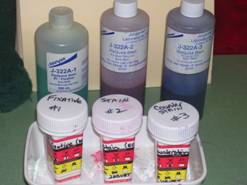
Figure 5: Set of 3 stains you will use to stain your slide
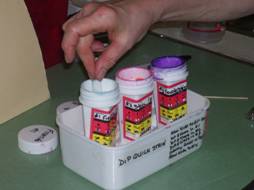
Figure 6: Dip slide slowly (2 seconds down and up) for a total of 8 dips in the fixative. You may see other figures for the recommended number of dips – this works well for me. Also, you may want to wear gloves which I did not do here – you may end up with stained fingers if you don’t.
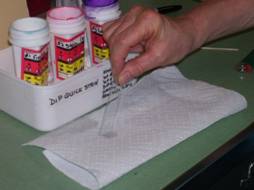
Figure 7: Tap a couple of times on a paper towel to absorb excess stain
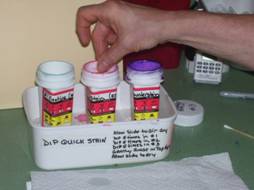
Figure 8: Dip slowly about 6 times in stain #2

Figure 9: Tap on paper towel to remove excess
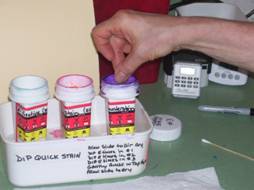
Figure 10: Dip about 6 times in stain #3
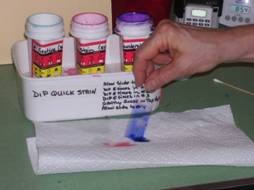
Figure 11: Tap off excess stain
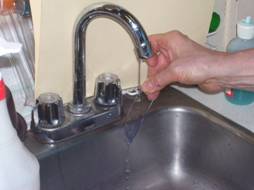
Figure 12: Rinse slide VERY gently under water so as not to rinse off any sample; allow water to run down from the top of the slide.
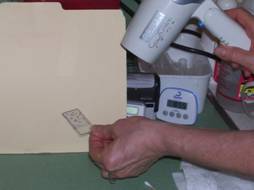
Figure 13: Air drying is recommended; but as usual there is no time for that so keep a hair dryer in the lab!
Now your slide is ready for microscopic examination. If it is not going to be read immediately, label the slide. This technique can be used for preparation of any sample that can be dried on a slide, including skin and ear smears, aspirates, and urine sediment.
