In-house PCV (packed cell volume) or HCT (hematocrit) testing is a quick and easy test to measure the level of anemia or dehydration. It measures the percentage of red blood cells found in whole blood. It is commonly used to check the status of a patient post surgically or post trauma where there has been known significant blood loss or suspected blood loss; as part of follow up after ingestion of certain toxins that affect red blood cells; as a monitoring parameter to certain diseases such as HGE; or as a monitoring parameter to AIHA treatment (auto-immune hemolytic anemia) where the patient is on a decreasing dose of prednisone.
You can use blood that has been collected in an anticoagulant tube, such as EDTA, but make sure it is the proper dilution. If you use blood directly from the patient, use a hematocrit tube that is coated with anticoagulant.
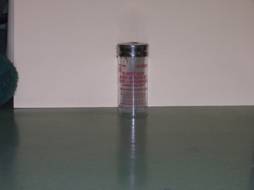
Figure 1: Example of the type of hematocrit tubes you can use
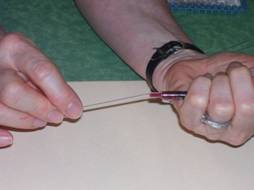
Figure 2: After drawing blood from the patient, place the end of the tube against the tip of the syringe, at a slight downward angle. You can also fill your tubes directly from the IV catheter you have just placed.
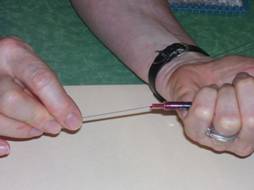
Figure 3: The blood will draw up into the hematocrit tube.
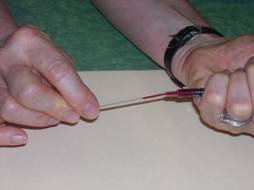
Figure 4: Continue to allow the blood to fill the tube to 1/2 to 3/4 full. Each tube can vary in the amount of blood.
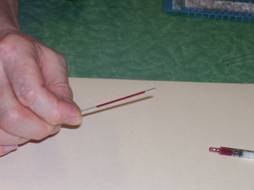
Figure 5: When filled, tilt the tube to move the blood away from the end. Wipe with a paper towel to clean.

Figure 6: Insert the end of the tube into the clay to form a plug at the end. Since you tilted the tube and moved the blood away from the end, you can keep the clay clean!
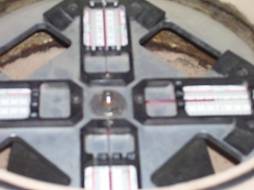
Figure 7: After filling all your tubes (you should do at least 4 tubes- inevitably if you do fewer, one will leak during spinning leaving you fewer values to average); place them in the hematocrit holders of your centrifuge. Clay plugs should be toward the periphery (outward); place the tubes so balanced. Fill a fourth tube with water if you have only 3.
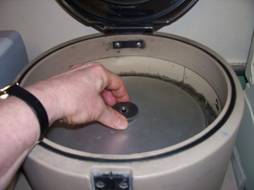
Figure 8: Don't forget to place the lid and tighten all the way!
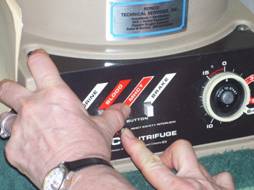
Figure 9: Set your centrifuge for its hematocrit setting
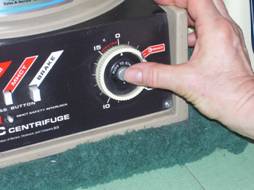
Figure 10: and turn it on. This one takes about 3 minutes.
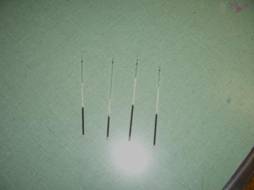
Figure 11: When done spinning, remove the tubes. The blood will have separated into the red blood cells (rbcs), buffy coat (leukocytes and platelets) and plasma (liquid portion of the blood). The buffy coat is a very thin layer between the rbc layer and the plasma. The tubes will show varying levels like these do.
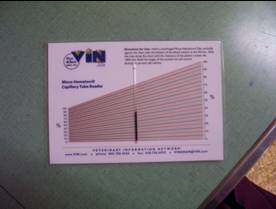
Figure 12: Place the tube on the hematocrit reader chart. It should be placed so the bottom of the rbc layer is at 0, and the top of the plasma is at 100; slide the tube along the chart until you find the perfect intersections. Read the percentage at the top of the rbc layer (do not include the buffy coat). In this case the PCV is about 50%. Read all of the tubes and take an average.
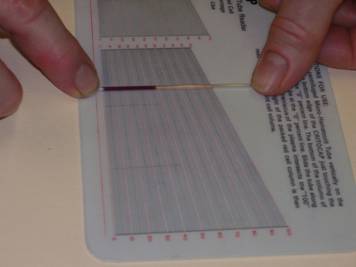
Figure 13: Here is another picture of how to find the perfect intersections as you slide the tube along the chart.
Also note and record the color of the plasma (eg clear and transparent, white and cloudy, yellow, etc.)
You can use the plasma from the microhematocrit tube to get a measure of total protein (also called total solids), which can be another valuable piece of information for the clinician. Since you have your sample right there, go ahead and always do a TP (total protein) even if the doctor does not ask for it.
Measurement of total protein uses an instrument called a refractometer. A refractometer shines a beam of light through a sample of liquid. It measures the amount of light that is refracted (bent) due to constituents in the sample. In blood, protein causes light to bend. The greater the protein, the more light is bent from the light path.
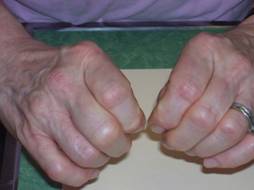
Figure 14: Break the hematocrit tube above the buffy coat.
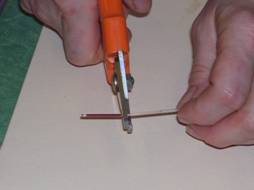
Figure 15: Some tubes will not break easily, so use a nail trimmer
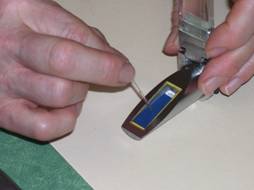
Figure 16: Place a drop of the plasma on the glass plate of the refractometer and close the cover. The drop should be obtained from the non-broken end of the tube so that fragments of glass do not get on the refractometer
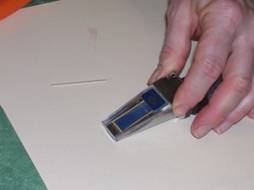
Figure 17: When you close the cover, there should be enough liquid to spread over at least half of the area, with no air bubbles
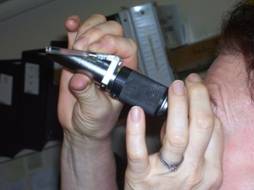
Figure 18: While holding the plastic cover in place, point the refractometer toward a strong light source
Depending on the refractometer, you may see three scales when you look toward the light. Generally the total protein scale will be on the far left. The horizontal line between the bright and dark area is used to read the scale, and should be sharp. If it is not, you may need more light or need to add more sample. You can also focus in by turning the eyepiece. Record the value in g/dl (grams per deciliter); usually this value will fall somewhere between 4 and 8.
REFRACTOMETERS
A refractometer is a delicate and not inexpensive instrument and should be treated with much care. It should always be kept in its special case until needed, and replaced immediately after cleaning.
A refractometer should be calibrated regularly to make sure it is reading accurately. Some come with a special solution, but otherwise you can use distilled water. Apply a drop of distilled water to the glass plate just as if it were a sample. Wait about 30 seconds for the temperature of the sample to adjust to the temperature of the refractometer. Read the scale; it should read zero. If it does not, it needs to be adjusted. Use a screwdriver to adjust the calibration screw until the boundary between the bright and dark area reads at zero.

After every use, clean the glass plate of the refractometer with distilled water and wipe dry with a kim wipe.
*** another cool thing to do with pcv tubes…
Lay a tube down on a slide, and place it on a microscope stage. Focus on 10x power on the buffy coat. If the patient is heartworm positive and there are circulating microfilaria, you will see the microfilaria gyrating in the buffy coat!
